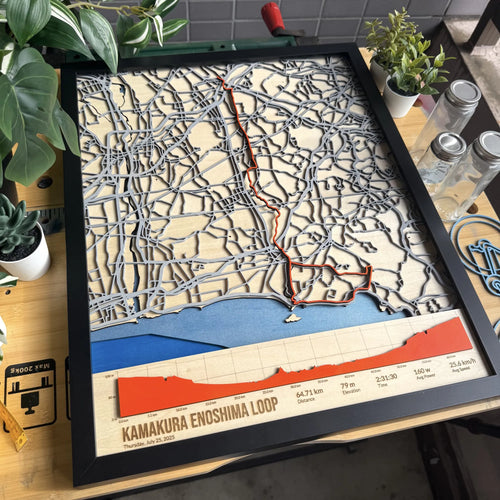
Making Your First Laser Cut Map: 6 Tips for Beginners
If you're considering buying a laser cutter, or you already have one and would like to try making maps, here are six things I've learned along the way.
1. Start small
My first tip is: don't start by making laser cut maps!
I did, and it became expensive, time-consuming and wasteful very quickly. A small mistake on a simple project isn't particularly painful. Discovering a problem after cutting several large sheets of expensive material is another matter entirely.
Maps can be surprisingly demanding projects. Fine roads and other geographic features require accurate cutting, while labels and small details require equally accurate engraving. Nudge one layer slightly and the pieces may no longer align. Make the finished design a few millimetres too large and it may not fit the frame.
Some of my first successful laser projects were much simpler. After visiting Kamakura, I drew one of the traditional rickshaws I'd seen there and turned the illustration into a simple single-layer wooden coaster.


See my Japanese Rickshaw Coasters
I then experimented with multiple layers by turning one of my school bus illustrations into a two-layer wooden design.

Projects like these gave me a much better understanding of how my drawings translated into physical objects before I attempted more complicated layered maps.
Start small. You will make mistakes. I still make mistakes.
2. Learn what your laser can actually do
A laser cutter is an incredibly capable tool, but buying one doesn't automatically tell you how to use it.
Spend time experimenting. Try different materials and thicknesses. Learn how your machine behaves when cutting fine details and engraving small text.
If you're considering buying a laser cutter, think about the kinds of projects you'd eventually like to make rather than simply choosing the largest or most powerful machine you can afford.
For map making in particular, fine detail and accurate engraving have been extremely important to my work.

3. Make something you're passionate about
My first maps were cycling maps for a very simple reason: I'm a cyclist.
That meant I already had a good idea of what I wanted a cycling map to contain, which details mattered and what I would personally want to hang on my wall.
I wasn't initially asking, “What map can I make that people will buy?”
I was asking, “What map would I want?”
That distinction helped enormously.

If you're passionate about hiking, start with a favourite trail. If you're a runner, try a meaningful race route. If you love railways, perhaps your local station would make an interesting project.
Knowing the subject helps you decide what deserves to be included. Only when I was happy making maps that I would genuinely want to receive myself did I start putting them online for other people to buy.
4. Use the right software for the job
One of the biggest challenges when making maps is getting from geographic information to a design that can actually be manufactured.
For my map work, I use MyLaserTools, specialist mapping software that allows me to create the initial map quickly and then refine the geographic information for each project.
I've also had the opportunity to work with the developers as a beta tester and provide feedback on features that are particularly useful when creating physical maps. It's rewarding to be able to share my experience and knowledge with the team and help improve the software for other map makers.
For me, control over things such as detail and line weight is important because what works on a computer screen doesn't necessarily work when cut from a physical material. A tiny road might look beautiful digitally and then fall apart when you try to cut it from wood.
Whatever software you choose, learn what it can do before tackling a complicated map. Solving a problem digitally before pressing Start on your laser can save a considerable amount of material and frustration.
5. Keep notes
This is nowhere near as exciting as watching a laser cutter, but it will save you an enormous amount of time.
Keep records of what you do.
I use Excel to record information about materials, projects and the cutting and engraving settings I've tested. Don't assume you'll remember. Once you've experimented with several woods, different thicknesses, card, acrylic and different finishes, it's remarkably easy to forget exactly what worked a month ago.
Record successful settings and unsuccessful ones. Note the material, thickness, power and speed. If something unusual happens, write it down.
Over time, you're effectively creating your own reference manual for your machine, materials and way of working.
6. Learn from other makers, but develop your own style
There is an enormous amount of excellent laser-cutting information available online. Before paying for a course, explore the free resources available. YouTube has some excellent laser-cutting channels, and websites such as yxecreations.com provide useful practical information.
Learning from other makers is one of the fastest ways to improve.
But if you eventually intend to sell what you make, it's essential that you be original.
There are already many talented and established map makers, so why should somebody choose yours?
Being inspired by other people's work is perfectly fine. Simply reproducing what everybody else is already doing gives a potential customer very little reason to choose you.
Experiment with materials. Develop your own visual style. Add features that reflect your interests or skills. Find something that makes someone recognise one of your pieces as yours.

For me, that process is still continuing, and it's one of the things I enjoy most about making maps.
Your first map probably won't be your best map. Mine wasn't. Your first laser project doesn't need to be something you can sell either.
Give yourself permission to experiment, waste some material, discover that an idea doesn't work and try it differently next time. Learning the combination of digital design, laser cutting and physical construction takes time.
7. Have fun! (Bonus tip)
There's no rush.
If your goal is to have as many products as possible listed on Etsy or Creema by this weekend, you're probably not going to enjoy map making for very long. It will quickly start to feel like work rather than the fun and creative hobby it can be.
Once you're comfortable making a few small pieces, try making something for someone you know. Create a birthday gift, a thank-you present or a small piece celebrating somewhere that's important to a friend.
You'll learn something from every project, and there's something particularly satisfying about giving someone an object you've designed and made yourself.
Your first map doesn't need to be perfect. It certainly doesn't need to be something you can sell.
Experiment, make mistakes and try things simply because you think they might look interesting.
Most importantly, enjoy yourself!

The Laser Cutter I Use
All of my maps are made in my workshop in Japan using an xTool S1 laser cutter. It has been my main laser for creating the detailed cutting and engraving used throughout my layered map designs.
Affiliate disclosure: The Amazon link below is an affiliate link. If you make a purchase through it, I may earn a small commission at no additional cost to you.